Let’s face it—switching multiple windows on your Mac is super annoying. Maybe right now you’re trying to get work done, and there you are, clicking back and forth between windows like a ping-pong game. I get it. It’s frustrating.
Maybe you’re comparing two documents. Or copying info from one place to another. Or watching a video while taking notes. Whatever it is, constantly switching between apps is driving you crazy. And it’s totally killing your focus.
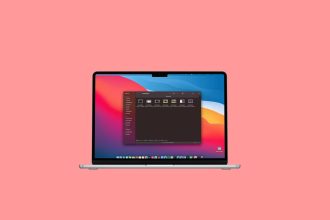
Here’s some good news: your Mac has a really cool feature called Split Screen. Think of it like splitting your screen into two perfect halves. No more jumping between windows. No more resizing things manually. Just two apps, side by side, exactly where you need them.
Don’t worry if you’re not super tech-savvy—I’ll walk you through everything step by step. No complicated stuff. Just clear, simple directions that’ll have you working smarter in the next few minutes. Let’s get started.
What is Split Screen on a Mac?
Split Screen on a Mac is a feature that lets you use two apps side by side. Period. Sharing the screen equally (or almost equally).
Think of it as dividing your screen into two separate spaces. You can keep one app open on the left and another on the right—both fully visible and ready to use.
It is really useful when you need to do some task on two different apps or compare some data in two apps. Just like, if you ask me, I do this when I need to open two text files and compare them. This is the time when I have to split the screen and open the two apps side by side.
This feature is part of macOS, and it’s built to make multitasking much easier. You don’t have to switch back and forth between windows or resize them manually. Everything fits neatly, so you can focus on your tasks without distractions.
So, instead of juggling tabs or struggling with overlapping windows, Split Screen gives you a clean, organized workspace. Once you try it, you won’t want to go back.
How to activate split screen on Mac?
Activating Split Screen on your Mac is easy, but the steps depend on how you prefer to do it. Let me break it down.
#1 Using the green button
This is the most straightforward method, especially if you have the latest macOS on your Mac.
- Hover your mouse over the green button at the top-left corner of a window. This is the button you usually use to maximize.
- A menu will appear. Select either “Tile Window to Left of Screen” or “Tile Window to Right of Screen.”
- Once one side of your screen is filled, click on another app from the remaining open windows to fill the other side.
And that’s it. Now you have both apps side by side, ready to use.
If nothing happens when you hover over the green button, you have to check your macOS version. Split Screen works best on macOS El Capitan and later. Make sure the app you’re trying to use supports Split View. Some older or niche apps might not.
#2 Using Mission Control
If you like managing multiple apps at once, Mission Control gives you a bit more flexibility.
- Open the apps you want to use in Split Screen.
- Activate Mission Control by pressing F3, swiping up with four fingers on the trackpad, or typing “Mission Control” into Spotlight.
- Drag one app window to the top of the screen to create a new desktop space.
- Drag another app onto the same desktop space.
Now, those two apps will open in Split View when you click on the new desktop space.
Mission Control also shows all your open apps, so it’s a great way to stay organized if you have several things going on at once.
#3 Keyboard Shortcuts for Quick Access
If you’re a keyboard person, here’s how to set up and use shortcuts:
- Go to System Settings > Keyboard > Keyboard Shortcuts

- Select App Shortcuts and click the Plus button

- Type in “Tile Window to Left of Screen” or “Tile Window to Right of Screen”
- Create your preferred keyboard combination

While there’s no default split-screen shortcut, you can use Control + Command + F to enter full-screen mode first, then arrange your windows using Mission Control.
#4 For older macOS versions
If you’re using macOS Mojave, El Capitan, or another older version, the process is slightly different.
- Click and hold the green button on a window. Yes, you need to hold the button.
- Drag the window to the left or right side of your screen until it snaps into place.
- Select another app window from the other side of your screen to fill the remaining space.
It’s not as smooth as newer macOS versions, but it gets the job done. If the green button doesn’t work, make sure “Displays have separate Spaces” is enabled in System Preferences > Mission Control.
Tips to adjust split screen for better productivity
Once you’ve activated Split Screen, it’s time to make it work exactly how you want. Small tweaks can go a long way in boosting your productivity. Let’s look at how you can adjust your Split Screen setup for the best results.
1. Resize windows
Sometimes, you don’t need both apps to take up equal space. For instance, if you’re watching a video on one side and taking notes on the other, you might want the notes window to be larger.
Here’s how to resize:
- Locate the divider between the two apps.
- Click and drag the divider left or right.
- Adjust the size until each app fits your needs perfectly.
If the divider isn’t moving, one of the apps may not support resizing. Try switching to a different app.
2. Switch window sides
Maybe you realize your apps are on the wrong sides. No worries—you can swap them quickly.
- Click and hold the title bar of one app.
- Drag the window to the opposite side.
- Release the mouse, and the apps will switch places.
This is especially useful if you’re used to having certain apps on specific sides of the screen.
3. Customize split screen behavior
Want Split Screen to work exactly how you like it? Customize it in your settings.
- Open System Preferences on your Mac.
- Go to Mission Control.
- Make sure “Displays have separate Spaces” is checked.
This ensures your Split Screen works seamlessly, especially if you’re using multiple monitors or external displays.
Alternatives to split screen
Not every situation calls for Split Screen, and that’s okay. If Split Screen doesn’t quite fit your workflow or isn’t working for your apps, there are other ways to multitask efficiently. Let’s explore some alternatives.
1. Manually resizing windows
This is the most basic alternative, but it’s surprisingly effective. You can adjust the size and position of each window manually to create a custom layout.
Here’s how to do it:
- Open the apps or windows you want to use.
- Click and drag the edges or corners of each window to resize them.
- Arrange the windows side by side, stacking them however you like.
This method gives you complete control over the layout. It’s especially useful if you need to work with more than two apps or if the Split Screen feature isn’t available in your macOS version.
2. Using third-party apps like Magnet or Swish
Third-party apps take multitasking to the next level. Tools like Magnet and Swish offer more advanced options for organizing your windows.
Magnet:
Magnet lets you snap windows into predefined layouts. You can quickly align apps vertically, horizontally, or even create a grid of multiple apps.
- Use keyboard shortcuts for quick alignment.
- Create a three- or four-window layout if needed.
Swish:
Swish is a gesture-based app that uses your trackpad to control windows. You can:
- Snap windows to the edges of your screen.
- Use gestures to resize or move windows around effortlessly.
Troubleshooting common split screen issues
Split Screen is great, but let’s be honest—it doesn’t always work like you expect. If you’re struggling to make it work, don’t stress.
It’s usually something simple, and we can fix it together. Let’s talk about the two most common problems and how to handle them.
1. When apps don’t support Split View
This is probably the most common hiccup. Some apps just won’t cooperate, and here’s why:
Maybe the app isn’t updated. Older versions often don’t support Split View, so check if there’s an update available. Or, the app might not have a full-screen mode, which is essential for Split View to work.
Another possibility? It’s a third-party app that’s not optimized for macOS. These apps can sometimes act up, especially if they’re not built for features like Split View.
What can you do? First, try using a different app. If Split View works with that one, you know the issue is with the original app.
Updating the app often fixes the problem, but if it doesn’t, look for an alternative app that does support Split View.
2. Check your macOS version.
If Split View isn’t working at all, even with compatible apps, the issue might be with your settings or macOS version.
Split View works on macOS El Capitan (10.11) and later. To check your version:
- Click the Apple logo in the top-left corner.
- Select About This Mac to see your version.
If it’s outdated, update your macOS to access Split View.
3. Enable “Displays have separate Spaces.”
This setting is required for Split View to work properly.
- Open System Preferences and go to Mission Control.
- Make sure “Displays have separate Spaces” is checked.
4. Restart your Mac.
Sometimes, a simple restart fixes minor glitches preventing Split View from working.
5. Force Quit and reopen apps.
- Press Command + Option + Esc to open the Force Quit menu.
- Select the problematic app and click Force Quit.
- Reopen the app and try using Split View again.
The takeaway
Managing windows on your Mac doesn’t have to be a pain. Split View is here to help. It’s simple, keeps things organized, and saves you from constantly switching between apps. It’s all about working smarter, not harder.
We covered the basics—how to use the green button or Mission Control to activate Split View. Adjusting and troubleshooting? Done. If it’s not for you, there are alternatives. Manual resizing works, or you can try tools like Magnet for more control.
The key is to experiment. Try these features out. Find what clicks for you. Once you get comfortable, you’ll see how much easier multitasking becomes.
What do you think? Did this guide make things clearer? Let me know—I’d love your feedback.