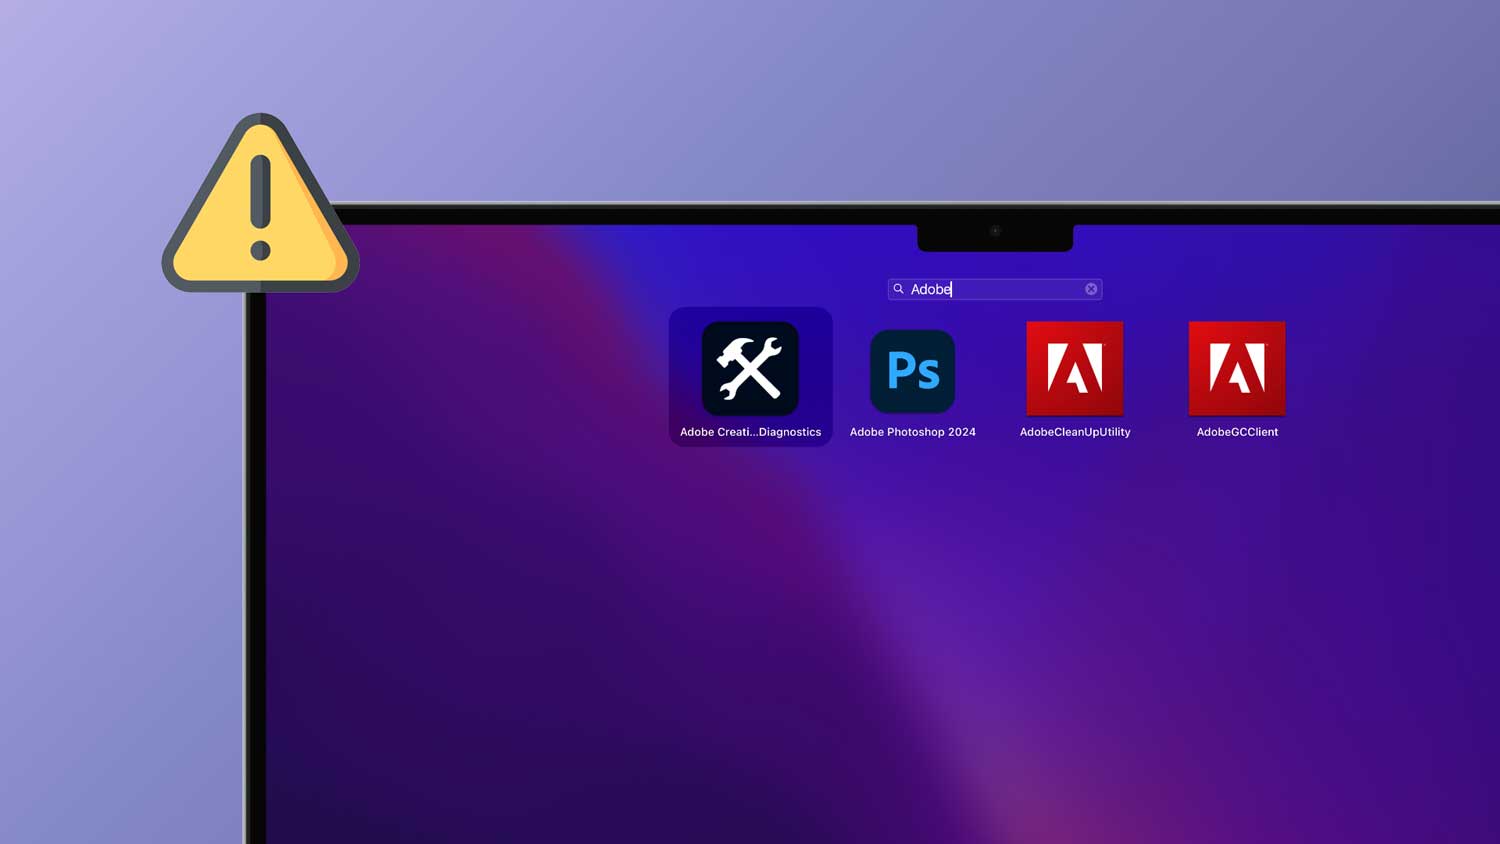
You’re excited to work on something. You click on Photoshop. Or Illustrator. Or After Effects.
And boom. You get hit with this message: “Sorry, this Adobe app is not available.”
You try again. Same thing. It tells you to check your internet, firewall, or ad blocker. But your internet’s working fine. Everything else online works. So what’s the problem?
Let me tell you what’s really going on. This error shows up when Adobe can’t connect to its licensing servers. It’s like the app is trying to ask permission to launch. But it gets blocked.
And yes, it’s usually your firewall, your hosts file, or your system settings that are doing the blocking.
How to fix the “Sorry, this Adobe app is not available” error
Let’s fix it step by step. You’ll be back inside your Adobe app in a few minutes.
First, if you’re using a cracked version (GenP or MonkRus)
You already know Adobe doesn’t want you using it. So your firewall and hosts file need to be adjusted to keep Adobe from phoning home.
Here’s how you do it using something called CCStopper.
If you already have CCStopper, great. If not, download the CCStopper.rar file and extract it.
Now do this:
- Download and extract CCStopper.rar.
- Run the chosen .bat file as Administrator.
- Choose one of these options:
- Option (2) for Internet Patch > (1) for Firewall Block.
- Option (2) for Internet Patch > (2) for Host File/DevNull.bat.
Done? Cool.
Now, let’s block a few specific Adobe processes manually.
Now block Adobe’s background services using the firewall
These services keep trying to talk to Adobe’s servers in the background.
If they succeed, you’ll get locked out of the app.
So let’s shut them up. To do it:
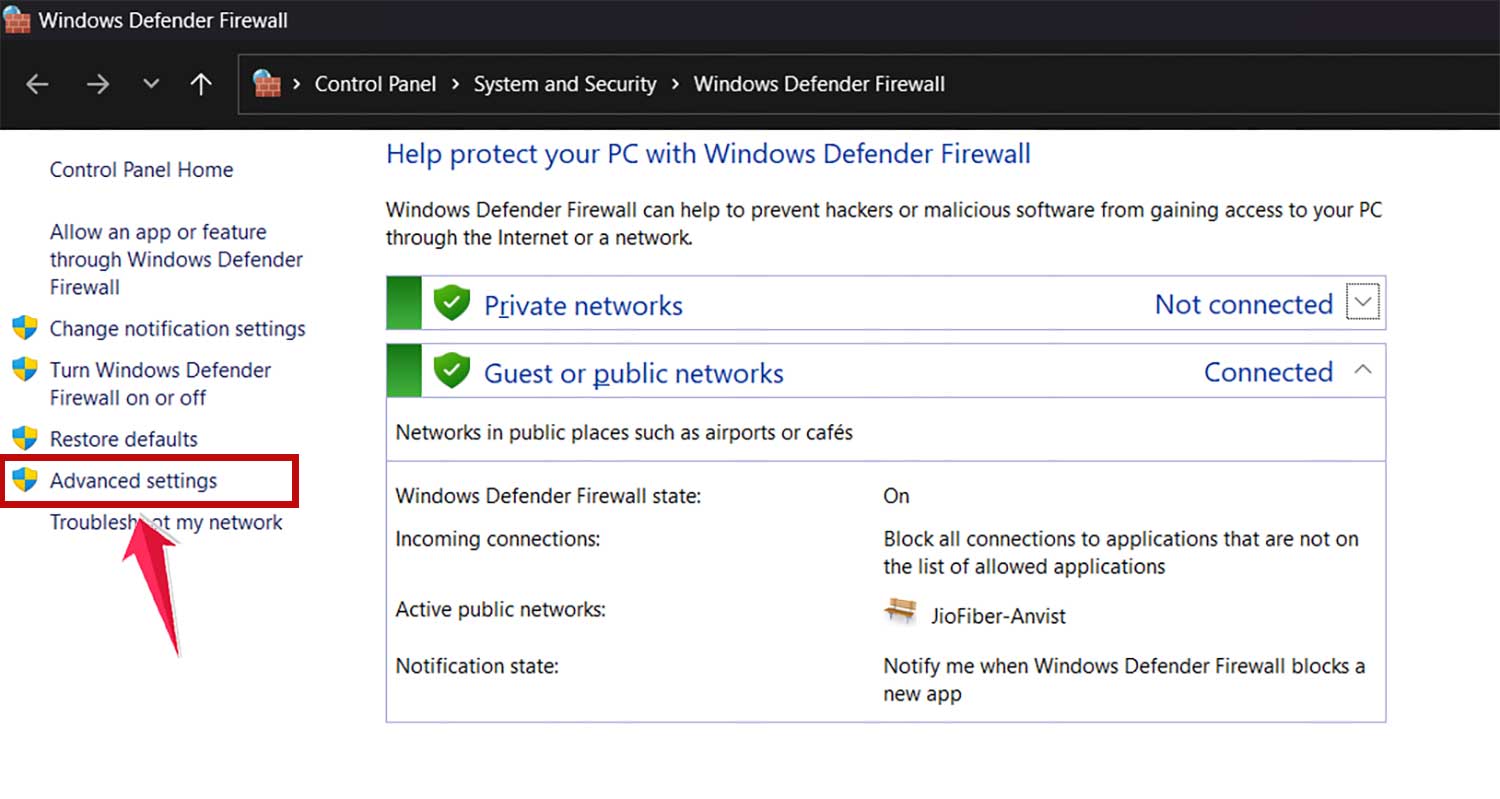
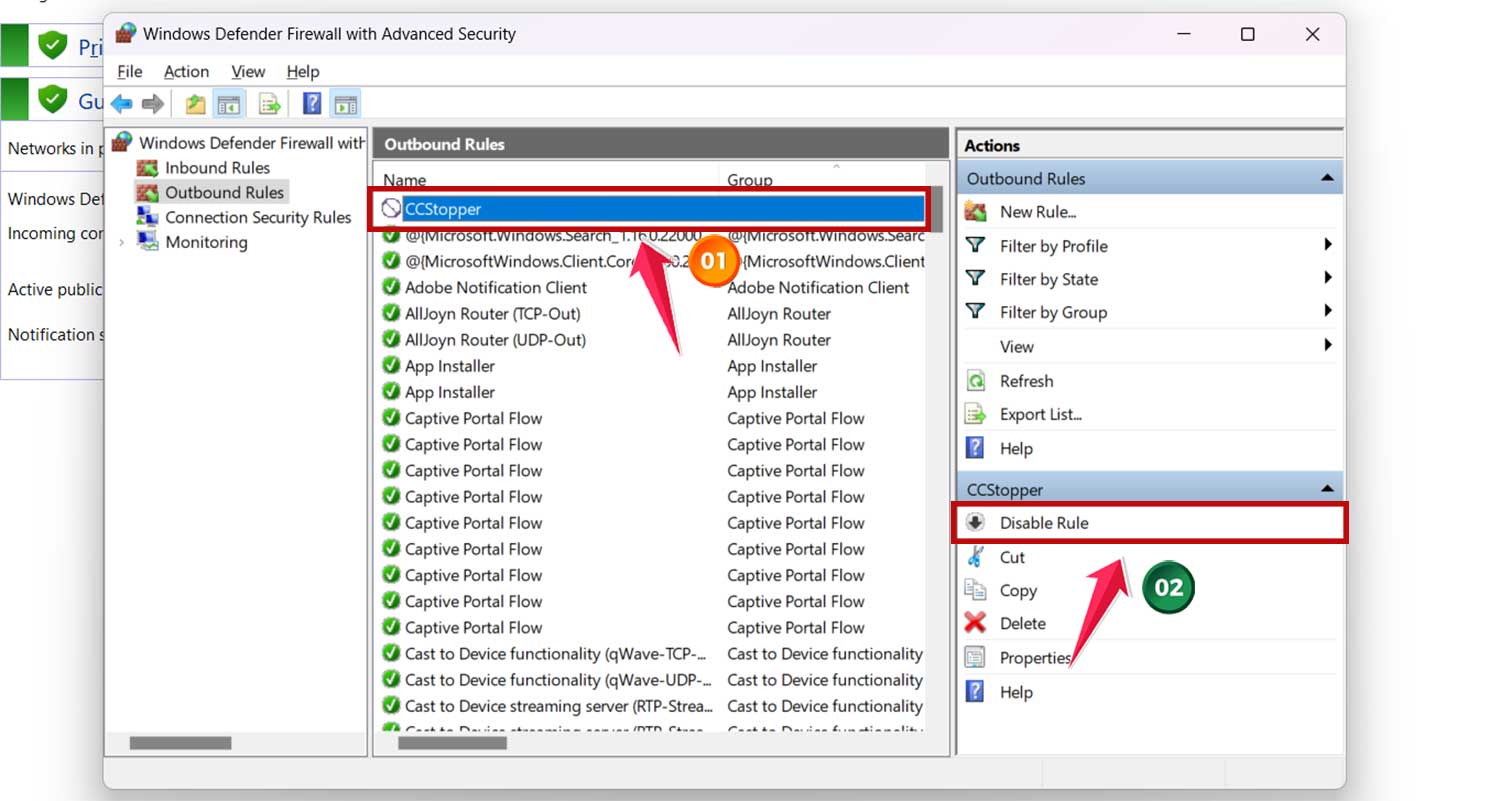
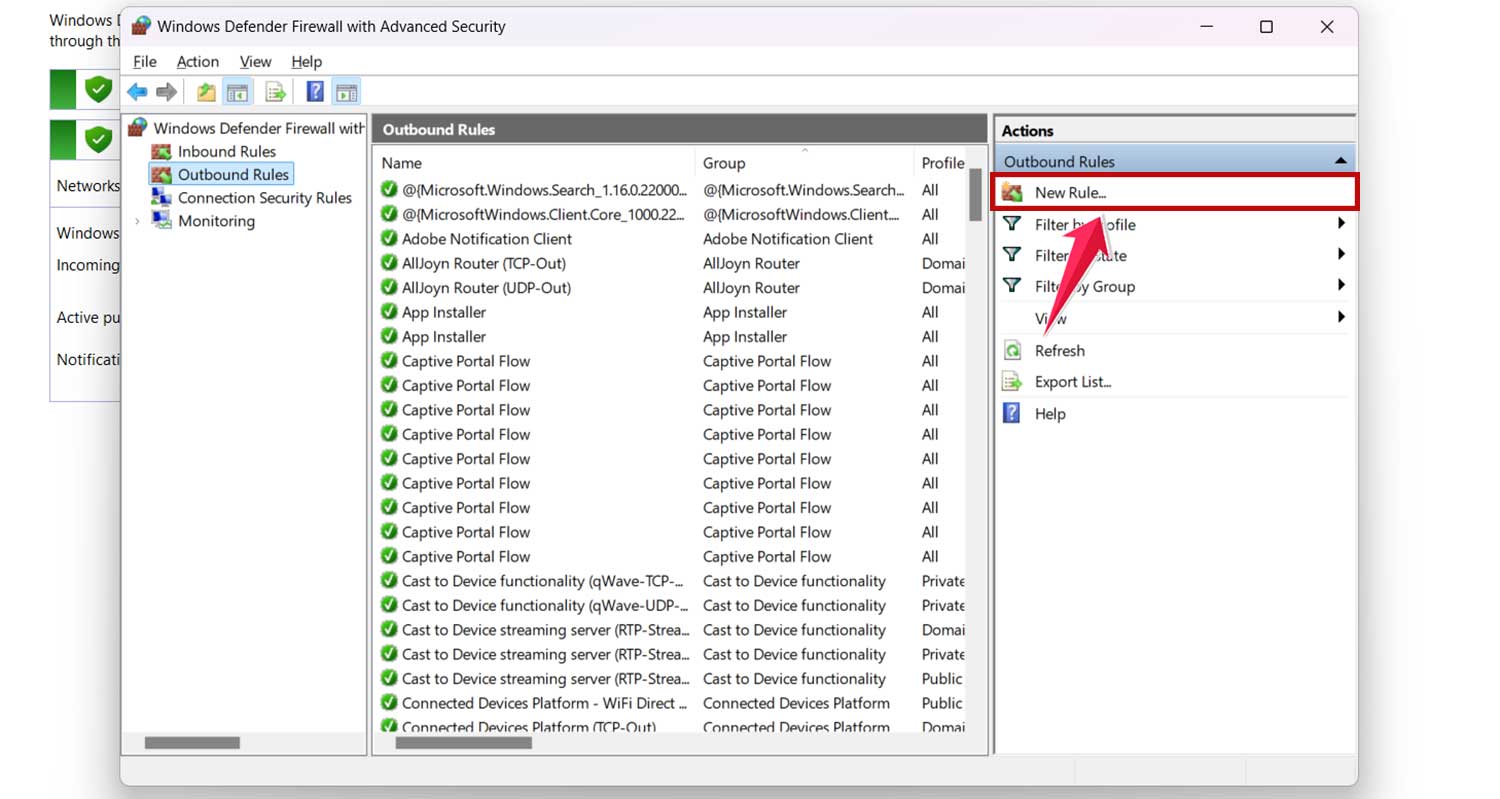
Open Start Menu. Search for Windows Defender Firewall with Advanced Security. Open it.
On the left, click Outbound Rules. Now, on the right, click New Rule. Choose Program.
Click Browse, then locate these files one by one:
- ADS Path:
C:\Program Files (x86)\Common Files\Adobe\Adobe Desktop Common\ADS\Adobe Desktop Service.exe - Licensing Path:
C:\Program Files\Common Files\Adobe\Adobe Desktop Common\NGL\adobe_licensing_wf.exe - Licensing Helper Path:
C:\Program Files\Common Files\Adobe\Adobe Desktop Common\NGL\adobe_licensing_wf_helper.exe
For each one:
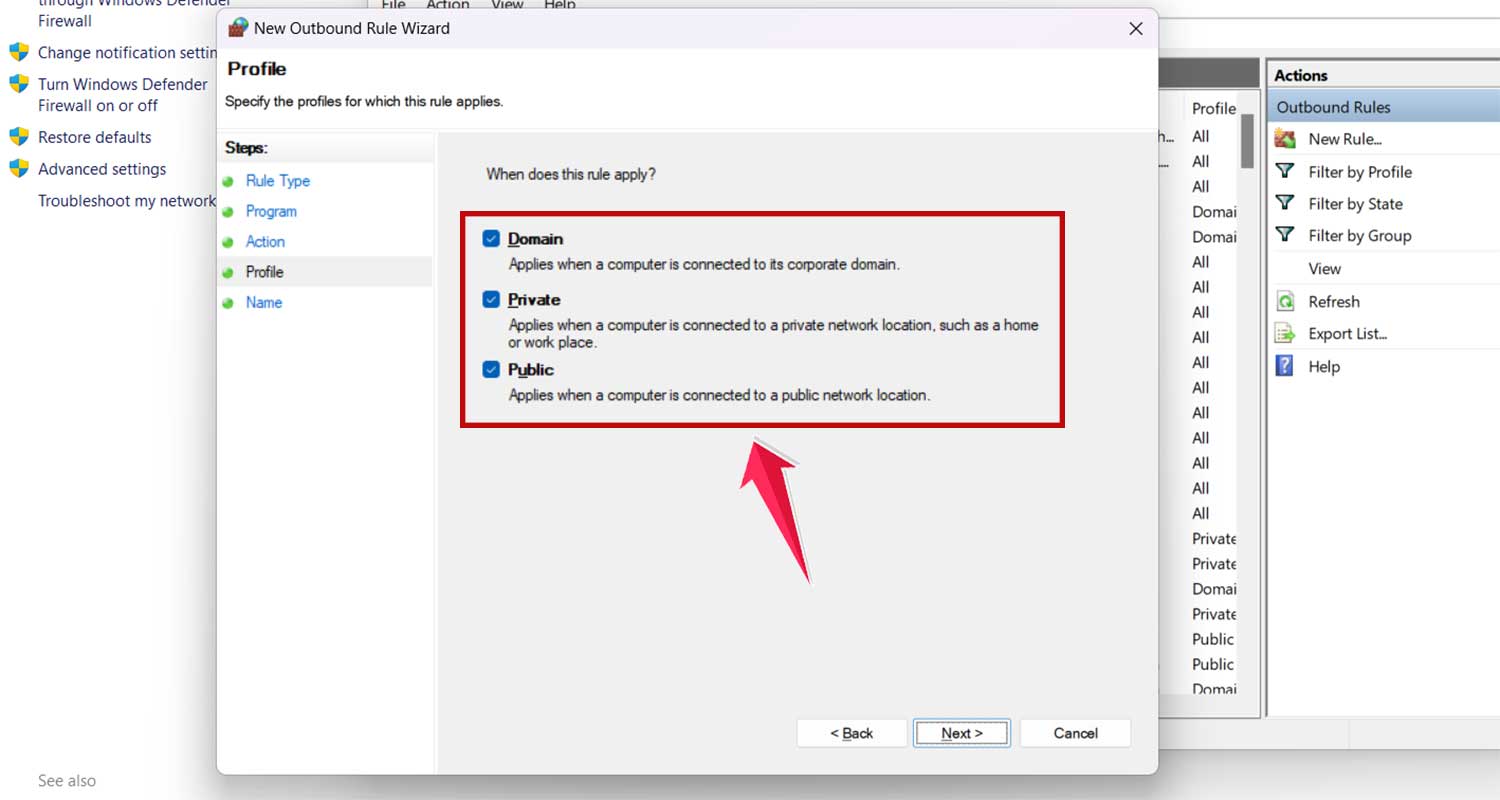
Paste the path into the program field. Click Next, then choose Block the Connection. Click Next again, check all three boxes. Click Next, give it a name like “Block Adobe Licensing.” Click Finish.
Repeat for all three files.
Done? Nice. That should stop Adobe from verifying your license.
Next, edit your Hosts file to block Adobe servers
This tells your system to redirect Adobe’s servers to nowhere. Basically, if Adobe tries to check your license, it gets stuck in a dead end.
To edit it on Windows:
- Navigate to
C:\Windows\System32\drivers\etc. - Open the “hosts” file with Notepad (right-click and choose “Open with“).
- Add these lines to block Adobe’s communication:
127.0.0.1 23.22.30.141
127.0.0.1 34.215.42.13
127.0.0.1 3.216.32.253
127.0.0.1 3.216.32.253
127.0.0.1 3.221.72.231
127.0.0.1 3.216.32.253
127.0.0.1 3.221.72.231
127.0.0.1 23.22.30.141
127.0.0.1 34.215.42.13
127.0.0.1 192.150.14.69
127.0.0.1 192.150.18.101
127.0.0.1 192.150.18.108
127.0.0.1 192.150.22.40
127.0.0.1 192.150.8.100
127.0.0.1 192.150.8.118
127.0.0.1 209-34-83-73.ood.opsource.net
127.0.0.1 209.34.83.67
127.0.0.1 209.34.83.67
127.0.0.1 209.34.83.73
127.0.0.1 3.216.32.253
127.0.0.1 3.221.72.231
127.0.0.1 3.216.32.253
127.0.0.1 3.221.72.231
127.0.0.1 ood.opsource.net
127.0.0.1 practivate.adobe
127.0.0.1 practivate.adobe.com
127.0.0.1 activate.adobe.com
127.0.0.1 adobe-dns.adobe.com
127.0.0.1 adobe-dns-1.adobe.com
127.0.0.1 adobe-dns-2.adobe.com
127.0.0.1 adobe-dns-3.adobe.com
127.0.0.1 adobe-dns-4.adobe.com
127.0.0.1 lm.licenses.adobe.com
127.0.0.1 hlrcv.stage.adobe.com
127.0.0.1 prod.adobegenuine.com
127.0.0.1 practivate.adobe.ntp
127.0.0.1 activate.wip.adobe.com
127.0.0.1 wip.adobe.com
127.0.0.1 ereg.adobe.com
127.0.0.1 ereg.wip.adobe.com
127.0.0.1 ereg.wip1.adobe.com
127.0.0.1 ereg.wip2.adobe.com
127.0.0.1 ereg.wip3.adobe.com
127.0.0.1 ereg.wip4.adobe.com
127.0.0.1 cc-api-data.adobe.io
127.0.0.1 ic.adobe.io
127.0.0.1 gw8gfjbs05.adobe.io
127.0.0.1 ph0f2h2csf.adobe.io
Save the file.

If it says you don’t have permission, run Notepad as Administrator first, then open the file through File > Open.
Once done, restart your PC.
On Mac? Here’s how to do the same thing
- Close all Adobe applications.
- Open Terminal (Command + Spacebar, type “Terminal“, hit Return).

- Type
sudo nano /etc/ hostsHit Return, and enter your password.

- Add the same IP addresses as listed for Windows users.
- Save changes (CONTROL + X, press Y, hit Return).
- Type:
sudo killall -HUP mDNSResponder && sudo dscacheutil -flushcacheIn Terminal, press Return.

If your Creative Cloud is stuck loading.
Sometimes Creative Cloud just sits there spinning. Doesn’t load. You can’t open any Adobe app because the cloud never starts.
If Creative Cloud is stuck loading:
- Go to Start Menu and then search & open Windows Defender Firewall.

- Now go to Advanced Settings.
- Look at Inbound and Outbound rules one by one.
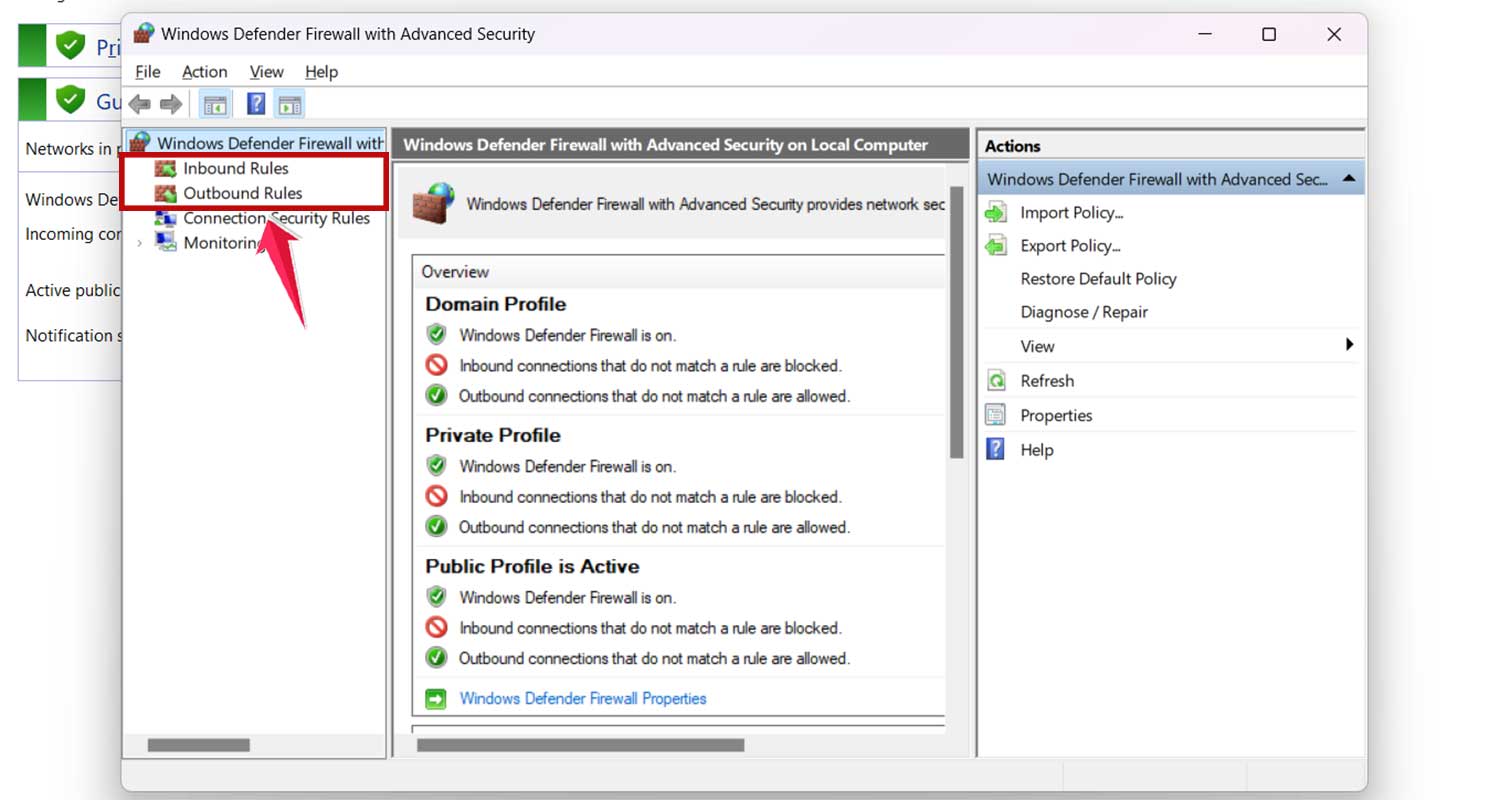
- Disable or remove any “CCStopper” rules or similar in both Inbound and Outbound rules.
- Edit your host’s file (
C:\Windows\System32\drivers\etc\hosts) and remove Adobe-related blocks. - Restart your computer.

Now try opening Creative Cloud again. It should launch properly.
Still blocked? Try using a VPN
Some internet providers or regions block Adobe activation servers.
If nothing’s worked so far, install a VPN. Pick any reputable one. Nord, Proton, Windscribe, whatever. Connect to a server in the US or Europe. Now launch your Adobe app.
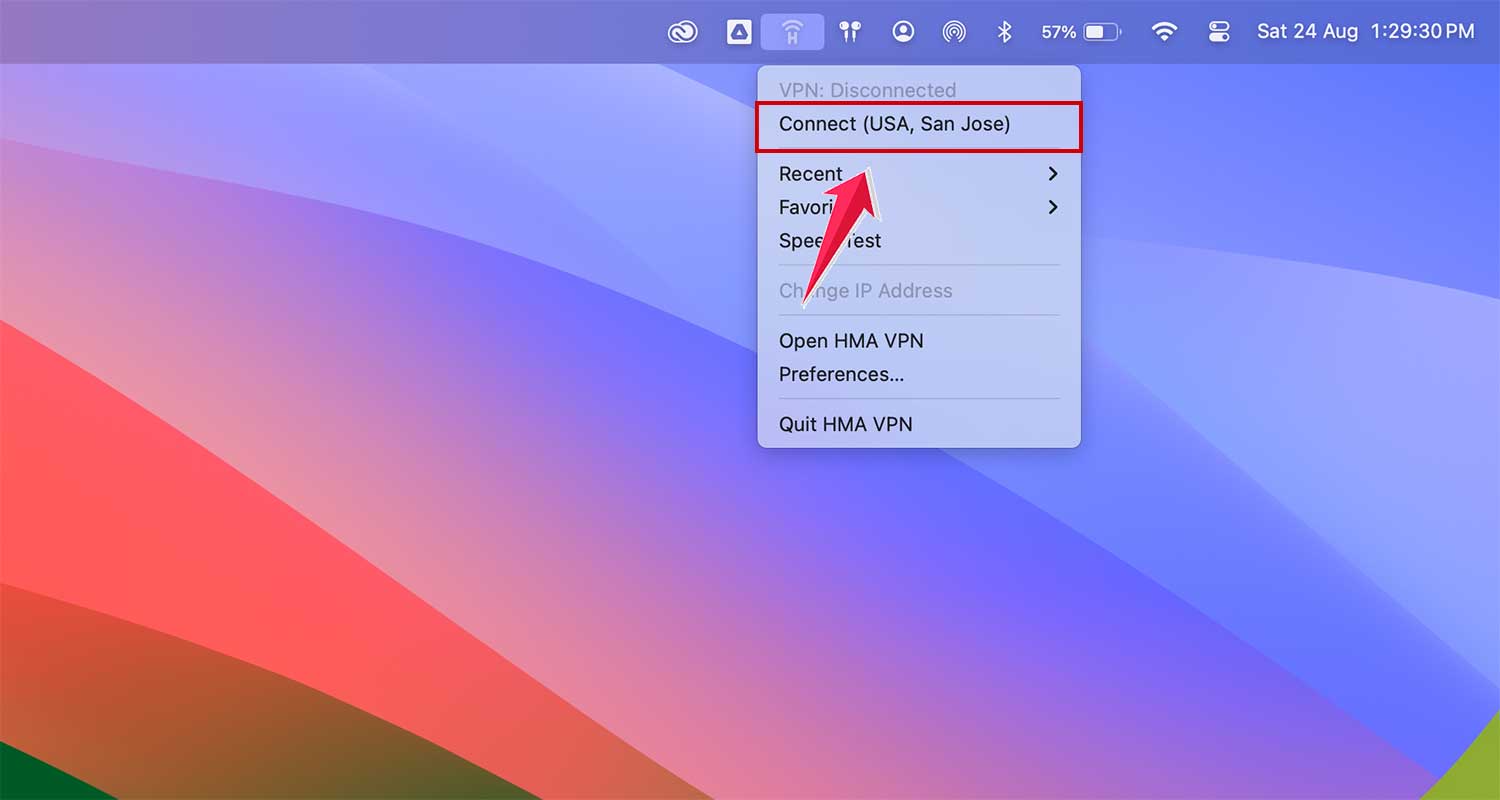
Sometimes, just switching your IP is enough to fix the error.
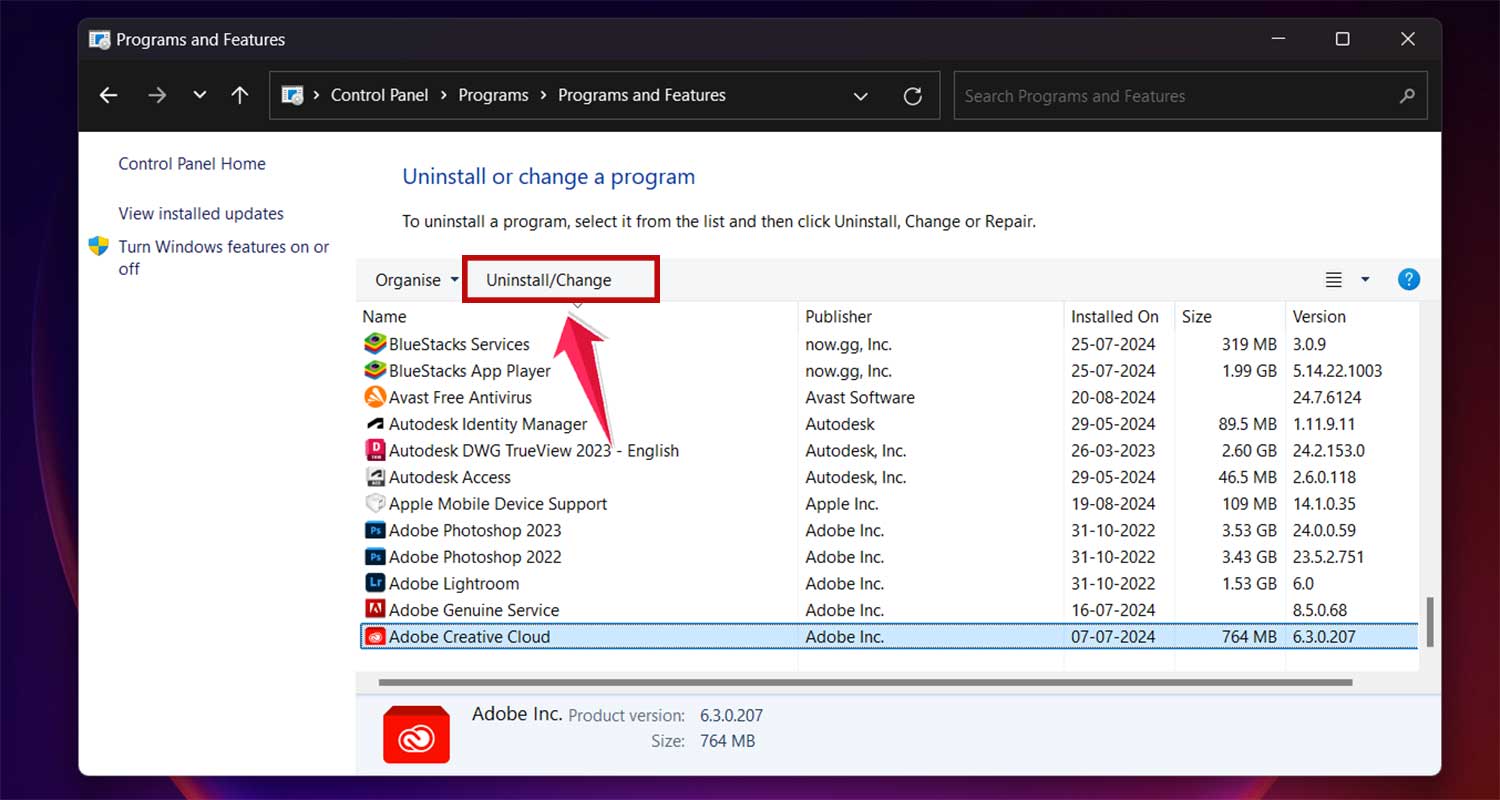
Last resort: uninstall and reinstall Creative Cloud
If all else fails, a fresh install might do the trick:
- Open Control Panel. Click Uninstall a program.
- Uninstall Creative Cloud completely.
- Restart your computer.
- Download the latest version from Adobe’s website.
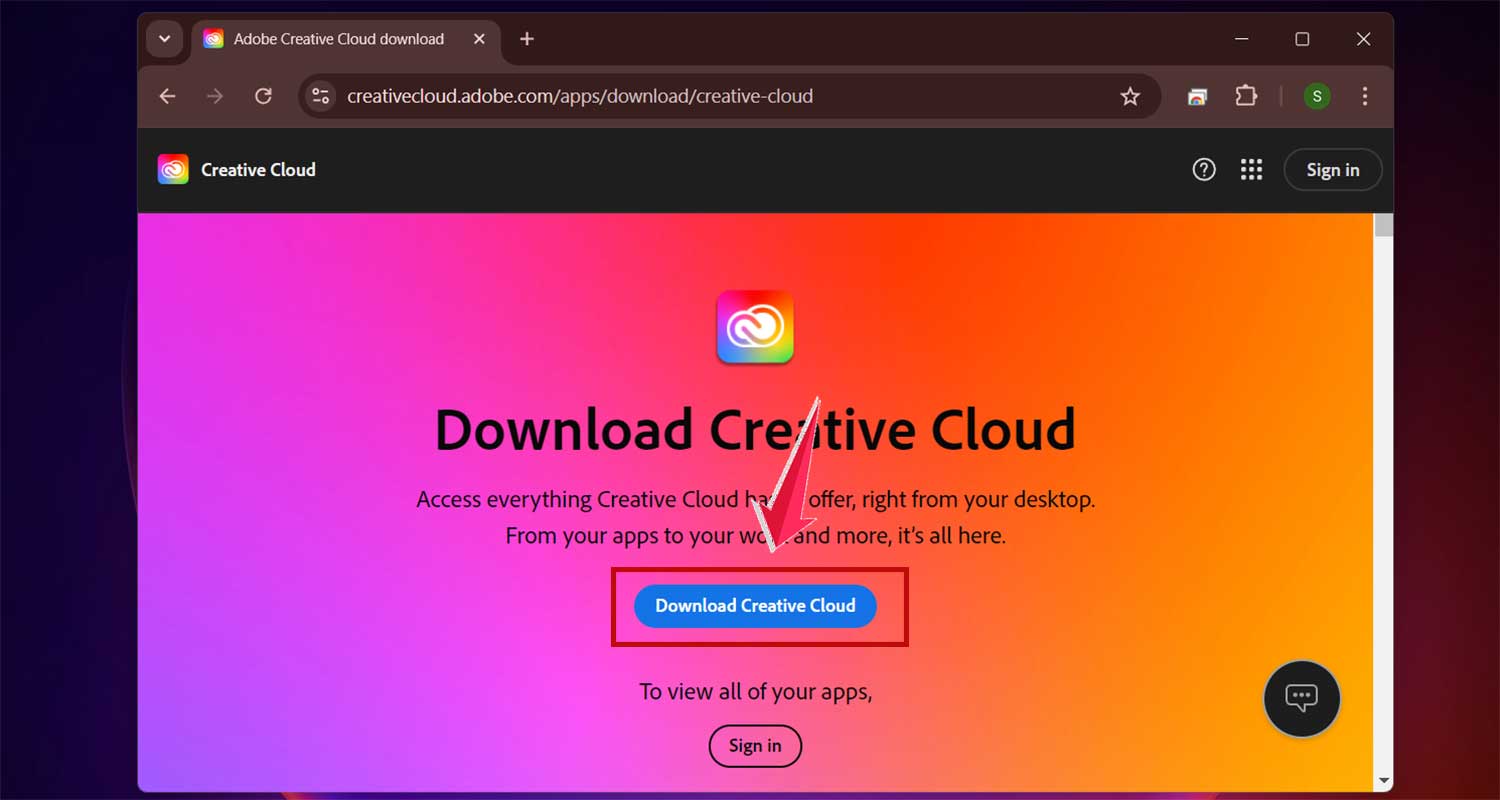
- Install and sign in again.
If the app launches without errors. You’re good. If not, go back and apply all the firewall and host file tweaks again.
Don’t forget. Every Adobe app you block needs its own firewall rule
Photoshop. Illustrator. Premiere Pro. After Effects. Each app has its own .exe file.
If you’re using any patched version or GenP activation, block each one manually.
- Go to the Start Menu. Now, Search for and Open Windows Defender Firewall.
- Then click on the Advanced Settings.
- Click “Outbound Rules“

- Then click on “New Rule“.
- Choose “Program” for the Rule Type.

- Find the app’s .exe file (right-click the app and choose “Open file location“).

- Copy the file path into “This program path“.

- Select “Block the connection” under Action.

- Check all boxes under Profile (Domain, Private, Public).
- Name your rule (e.g., “Block Photoshop Internet“) and click on “Finish”.

Repeat for every app you use.
This ensures no app can call home and lock you out.
Still seeing “Sorry, this Adobe app is not available”? Try this final fix
Open Task Manager. Look for anything Adobe running in the background. Even Creative Cloud. Right-click and End Task for all of them.
Now go to this folder:
C:\Program Files (x86)\Common Files\Adobe\SLCache
And also:
C:\ProgramData\Adobe\SLStore
Delete everything inside those two folders. Yes. delete.
Now restart your PC.
Open the app again. It should launch.
The takeaway
This error looks scary, but it’s not. You’re not locked out forever. Adobe just wants to check your license. You just have to block it politely.
Whether you’re using the app legally or with a patch. This fix works. Block Adobe’s internet access.
Stop the licensing service from running wild. Edit your hosts file. And if things go really wrong, start fresh.
Once you’ve set it up properly, you can use your Adobe apps without interruptions. No more “Sorry, this app is not available.” No more Creative Cloud headaches.
And if Adobe updates something and breaks it again. Come back to this guide. You now know exactly what to do.